
cooking
How to make Ciabatta

So this weekend I thought I’d better practice. I have tried a number of recipes over the years, and the one that I like the best is from Jeffrey Hamelman’s book called ‘Bread, a baker’s book of techniques and recipes’. Below is a my own adaptation of his recipe.
As I understand it Ciabatta is not a bread with an ancient history but was invented about 50 years ago in Italy and it’s name comes from the Italian word for slipper. What I want to see when I make Ciabatta is a soft and very holey inside and a beautiful golden crust – best eaten straight away, dipped in olive oil. To get really big holes the dough needs to have a higher percentage of water than usual and needs careful handling. Its a yeast dough and you make it in two stages- starting the night before with a Poolish. This is a mixture of roughly equal quantities of water and flour with a little bit of yeast, which ferments slowly for at least 12 hours. This mixture is then added to more flour water and yeast as well as salt to make up a loose mixture which will be your final dough.
Ingredients
Poolish
1 cup white bread flour
1 cup water
1/8 tsp of instant dried yeast (from sachet)
Final Dough
2 1/2 cups flour
3/4 cup water
1/2 tsp instant dried yeast
1 1/4 tsp salt
Method
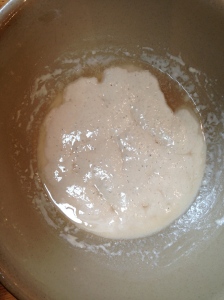
1. Mix together the poolish ingredients in a bowl. Cover with shower cap or cling film and let it sit at room temperature for 12-16 hours. It will be dotted with bubbles by this stage
2.Mix all the other ingredients, except the salt, into the bowl, cover and let it sit for 1/2 hour.
3. Add the salt, dispersing it evenly across the top of the dough and fold by scooping up dough from the bottom of the bowl with a large spoon and folding it over the top. Do this 3 or 4 times and leave, covered for 1/2 hour
4. Fold again 3 or 4 times and let it sit for another hour then repeat the folding
5. Fold again in the same way and leave for another hour. It should then be very billowy and puffy- if not leave it for another hour

6. Put the dough on to a floured surface and cut in half with a wet knife or dough scraper and then lightly flour each half.
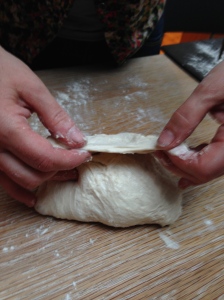
7. It will be quite sticky so you’ll need to keep your hands floured. Gently stretch the dough from the top and fold it back on itself. Then stretch and fold the dough from the bottom
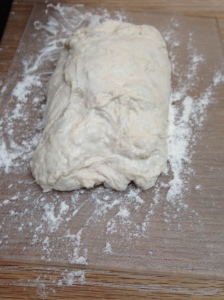
8. Place each piece of folded dough onto a floured board and gently stretch it out a bit so it is roughly rectangle shaped
9. Cover each batch of dough with a cloth and leave to rise for about an hour.
10. After 1/2 hour pre-heat the oven to 245 degrees C
11. Now for the tricky part; you need to gently pick up each batch of dough and spread out your fingers underneath it as you do so and place on a floured baking tray. You may find you need to unstick small sections from the floured board- this is fine. I find that if you dimple it a little by pressing down in a few places with your fingers you’ll get a better, flatter shape at the end, because you don’t want a domed shape loaf.
12. Place a small baking dish on the bottom of the oven with a cup of boiling water to create steam
12. Place the doughs into the oven and bake for about 20 minutes until its golden brown and sounds hollow when you tap it from the bottom

